

Admin Onboarding
Admin Onboarding is a one-time setup wizard that runs the first time you open the Zilla Console management console. It creates your organization and admin account, then hands off to the live console to finish setup.
It only needs to be completed once. Subsequent logins use the credentials you create below.
Prerequisites
- The Zilla Console stack is running and accessible.
- You have a valid email address for the admin account.
The Wizard
Navigate to the management console (default: http://localhost:8081). If the console has not been configured before, the setup screen loads automatically.
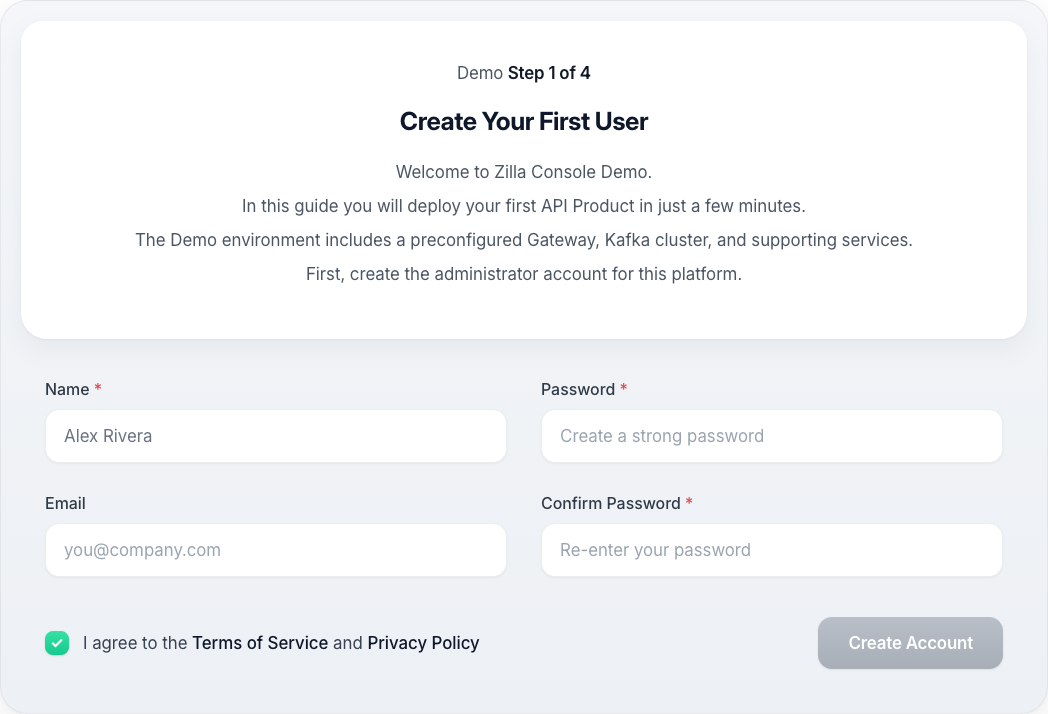
Create Your First User
- Full name: how you appear to teammates in activity feeds and audit logs.
- Work email: becomes your sign-in username and where platform notifications go.
- Password: at least 12 characters, including both letters and numbers.
Continuing creates the organization and your admin account, and signs you in.
Setup Complete
The wizard hands off to the app with a docked Demo panel open, which continues in the live console: create your first API Product, publish it, and finish.
Info
The Demo Docker Compose bundle pre-provisions the environment, Kafka cluster, and Gateway Group for you automatically.